
Last year, I had the privilege of interviewing 28 of the top educators and creators in the food photography industry for the Master The Art of Food Photography Summit. Needless to say, I learned so many pro tips and tricks I would love to share with you.
Camera Phone Food Photography Tips From A Full-Time Food Photographer and Educator
In one of my interviews with industry professionals, I gained a lot of insight from Skyler Burt who is a full-time food photographer and educator.
This post will cover plenty of pro tips and ways for beginners to unlock the potential of their iPhone or camera phone for great food photography.
You’ll be learning plenty of tips and tricks from the best apps to help you make the most out of your camera phone, to budget props that can allow you to master the basics of photography such as lighting, styling or composition as a beginner.
7 Pro Tips For Stunning Food Photography With Your Camera Phone
Table of contents
- Camera Phone Food Photography Tips From A Full-Time Food Photographer and Educator
- 7 Pro Tips For Stunning Food Photography With Your Camera Phone
- Tip 1: Style Your Subject To The Camera By Locking Your Camera With A Tripod
- Tip 2: Work With Artificial Light And Diffusers
- Tip 3: Use A Phone App To Adjust Settings
- Tip 4: Become Visually Literate By Looking At Other Food Photography
- Tip 5: Use Shapes For Better Composition
- Tip 6: Props For Using Natural Lighting
- Tip 7: Get outside your head–and your comfort zone
Skyler believes that with food photography, the camera really does not matter because it involves shooting a static subject in a studio setting. In this case, the subject is beautiful-looking food that does not move. That is why it is great for beginners to start mastering the art of food photography using their camera phone.
In order to set yourself up for success, there are a few things you need to keep in mind before you get right into taking stunning food photos.
Firstly, it is vital that you spend some time planning out your shoot and knowing what your story is going to be even if you’re just using your camera phone. Other elements such as lighting, composition, subject and prop placement are really important to keep in mind.
The bottom line is, with a few pro tips and budget props, you can really use your camera phone to make some great images.
Using your camera phone is a great starting point, as the first introduction to photography most people have is from pulling out their phone and taking some snaps. You can then use some of what professional photographers do when it comes to organizing a photo shoot and use those same techniques and skills with your camera phone, and start taking gorgeous food photography.
Tip 1: Style Your Subject To The Camera By Locking Your Camera With A Tripod
One of the most common mistakes beginners make is failing to style to the camera. The best way to do that is by locking your camera down on a tripod, which you can easily do with just a few equipment.
If you’re on a tight budget, you can easily purchase a cheap tripod and a phone adapter to start. Next, get your camera phone secured on a tripod, and build your story to the lens instead of moving your lens around the table and trying to find a good angle.
Pro Tip:
Build your food photography story fresh by using a completely blank table. Next, start building the scene one little piece at a time, by slowly bringing in some props and moving them about to see if you like the result. By having your camera phone locked in to a singular position, you will have a steady frame of reference to check back and see whether you like your food images.
Alternatively, if you are holding your camera phone by hand, you will not have the ability to check how the movement of props create different results. This is because every time you raise your camera up or over the table while trying to do some crazy balancing act, the camera angle and focus changes. Doing so also changes where the light is coming into your frame and creates discrepancies in your food photography.
In short, locking your camera phone down using a tripod and moving your props and subject around allows you to keep most of the variables as constant as possible. As a beginner food photographer, working with light, exposure as well as trying to get your food story right all at once can become overwhelming.
Tip 2: Work With Artificial Light And Diffusers
Working with some good artificial light is also very important, as sometimes you might be doing shoots at night during your free time. During winter, the lack of daylight as well as cloudy, snowy conditions will make taking photos very challenging.
That is why it is impossible to shoot with natural light on a consistent basis, even when it is food photography. If possible and within your budget, work with artificial lights. In fact, you can invest in some decent $20 artificial lights from Home Depot and make a great indoor lighting setup.
Next, a photography diffuser is another piece of equipment that goes well with your camera phone or even a DSLR. For under $50, you can buy a diffuser to block off some of the natural light or soften some of the lights. Alternatively, you can be creative and use a white bed sheet or some baking paper to act as your diffuser. For those who are just jumping into food photography with a small budget, these are some items and techniques that can really save the day and get you inspired.
Later down the road, you can sink some more money into a professional camera, professional lights and softboxes.
Tip 3: Use A Phone App To Adjust Settings
One of the limiting factors to using your camera phone is the inability for you to change lenses, which means you can’t really manipulate the depth of field as well as you could with a DSLR or a mirrorless camera.
As a result, you will end up with a singular plane of focus, which works really well for when you're photographing above the table. If you are using your camera phone, it is best to dive into a photography shoot from above the table to get the best results. This is because you do not have to worry about the depth of field so much as compared to when you're trying to photograph from in front of the table.
If you would like more control over your camera phone’s capabilities, the Lightroom mobile app is a great option for you. You can control the things like exposure and ISO and shutter speed and the white balance and all the things that you would control with a DSLR.
Most importantly, the app gives you a level overlay on your camera so that it keeps your photos aligned properly even when you’re sometimes holding your phone slightly to the left or right.
Additionally, the Lightroom mobile app also gives you a grid and a level of overlay on your phone, which you can then import your photos and start editing. You can then trade it to your computer and start editing there if you want to.
Another great app is VSCO, which has all the same abilities to control the camera on your smartphone. The VSCO app has a little camera button down at the bottom that opens up your camera and gives you all these different controls that allows you to use overlays like grids.
Using these apps can help you out immensely with your composition and highlight peaking. So, in case you're overexposed when taking your food photography, the mobile apps give you some warning or symbols to remind you. You will have access to a modern DSLR that you will otherwise not have with your straight camera app on your iPhone or Android phone.
Tip 4: Become Visually Literate By Looking At Other Food Photography
Becoming more visually literate will definitely help you improve in your food photography. This is because the more work you look at, the more compositions you will have in the bank of your memory.
Doing so also really helps out in those instances where you have more inspirational instances that rely on your artistic intuition on composition because you’ve seen it done before.
Pro Tip:
Crack open Pinterest and create a mood board. You can also visit your favorite photographer’s website or portfolio site, and just deconstruct how they made that image.
Some questions you can ask yourself include:
- What were they thinking when they took that picture?
- Why did they put this there and this over here?
- What was going on in their minds and is there something to it that I can pull from?
It is important to remember that this is not about imitating or copying another person’s work, but rather to pull cues from another photographer’s work. Look at a whole variety of photographers that are outside of your niche, including travel, war and journalist photographers. You can even draw inspiration from TV, music, visual art and dance!
Tip 5: Use Shapes For Better Composition
There are a lot of different ways that you can compose an image and draw your viewers in.Composition is all about drawing your viewer in and keeping them looking at the photos so they don't click away.
You can keep or lock viewers into your photo with a lot of different techniques for composition.
Using continuous shapes by arranging props to your subject is one of the best ways to do so. Lock them into a continuous shape, whether that be a triangle, circle, square or two objects bouncing back and forth, you can look at it like you have an object here and an object there.
For example, keep your viewer’s eyes bouncing between your hands, to the pie and then at the cup next to it and lastly onto the plate of spaghetti or something.
Allow some negative space to feature in your photography while using shapes and different designs to keep that viewer interested in your photo for a longer time.
This is why locking your camera down into a single position is so important because then you're able to build that composition and test things out and say, “Oh no, that didn't work, scrap it”. And then go back to create a different composition.
That's why overlays are the easiest because you're able to do that type of composition with a camera in front of the food. The best overlays are layers and lines leading your subject. You can also lead your viewer to the subject by using forks, napkins or cups for layers.
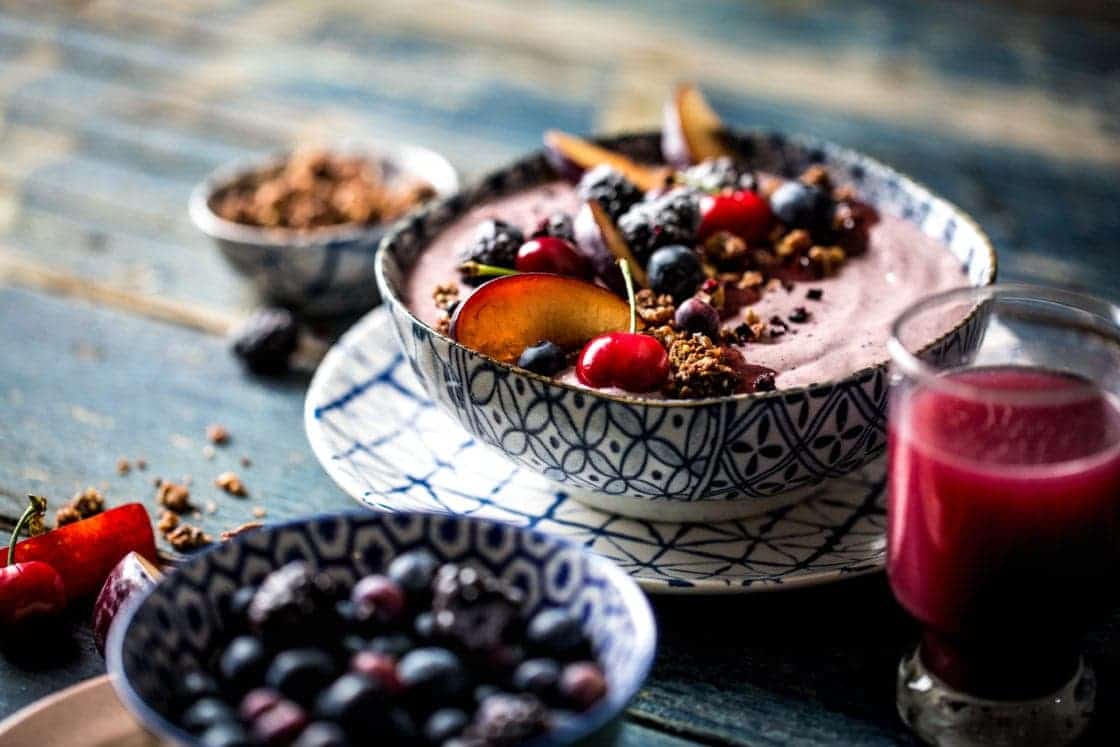
Additionally, if you want to have a foreground and a background, you can use glasses in the foreground and some bottles in the background to “sandwich” your subject together. This way, your viewer will look past the subject and stay locked in that area.
If you are taking photos from above the subject, you can also place things that will frame your subject up nicely. Doing so makes it visually interesting while keeping the subject important. One of the biggest problems beginner’s face when they photograph a subject is by placing too many objects on a table and presenting them to the viewer via their photography. This really confuses the viewer as they don’t really know what's important within the food image.
As the photographer, it is your job to help the viewer decide what the most important thing is in the photograph without having to guess. You can do that by framing up that subject or by using lines to lead to that subject. On top of that, you can also make the subject the brightest or most colorful thing in the photograph.
These are all visual cues that tell the viewer, “Hey everyone, this is the most important thing.” Most importantly, make sure that your story is clear enough and that your composition works in a way in which it gets the viewer to look at your subject.
Failing to do this will cause your viewers to bounce around your photograph and then leave or, or move on to the next photograph.
This is why looking at other people's work should be part of your process. Good composition only comes intuitively after you've looked at 10,000 photographs and other photographer’s work.
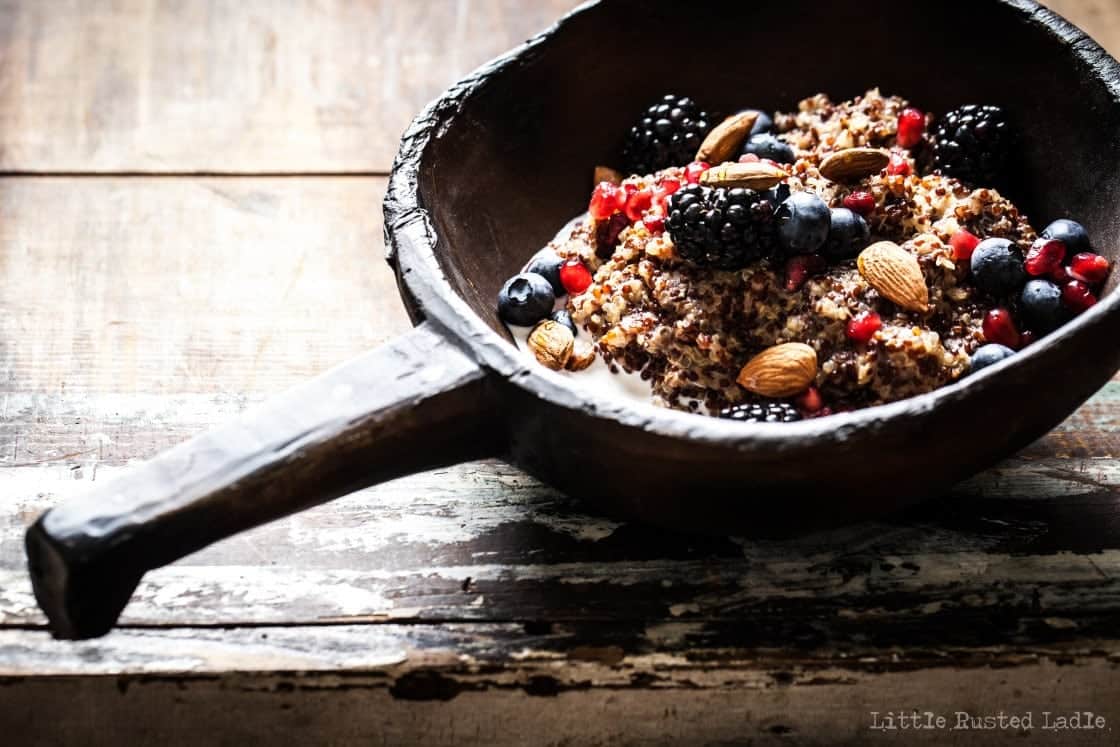
Tip 6: Props For Using Natural Lighting
Photographing with natural light is probably going to be every beginner’s first entrance into food photography as it is accessible to everyone. If you don't have the budget for artificial lights, or haven’t yet mastered using artificial lighting, natural lighting will be what you are working with in the beginning.
You might be admiring how beautiful the direct, hard light rays are coming through your bedroom or kitchen window. This will inspire you to take some food photos using your camera phone right in front of it. However, it might be better to use diffusers, baking paper or a bedsheet for a better result.
This is called direct diffused natural light. When you have direct sunlight and use a diffuser, this creates a deep, soft shadow instead of a hard status. The end result is the dark and moody aesthetic.
Even the highlights are nice, soft and smooth, but everything has a lot of contrast. If you don't photograph with direct feed light, you'll have a low contrast image.
One of the biggest problems with shooting natural light is getting those direct light rays coming through your window. It only happens at certain times of the day, depending on where your window is positioned in your house, what season of the year it is and how that sun moves across the horizon.
Alternatively, you can also use a lot of black cards because oftentimes you can't control the spread of natural light. Natural light tends to bounce off your walls and, and bounce off your ceiling and then fill in that nice contrast that you're looking for.
Pro Tip:
Use black cards to block the light from hitting your background by using them to funnel natural light around your subject. Doing so will allow the natural light to hit either your subject or just the table instead of the background, ceiling, carpet or the wall adjacent to your setup.
Another important tip would be not to place your table right next to a wall because that light will hit that wall and bounce back in to fill those shadows you do not want.
Lastly, make sure that you are photographing in a room that does not have a strange color of paint on the walls. For example, yellow or tinted paint. This is because if the light from your window hits that yellow paint, it'll give your photo an undesirable yellow cast.
You can also get really creative with black cards by cutting out different shapes to get that dappled light look. You could also cut some slits in a white bed sheet to use it as a diffuser. Some of that hard light will pour through those slit tracks and the sheet to give you that natural dappled look which is really beautiful.
| Sidebar: Consider creating your own cucoloris, sometimes called a “cookie,” a black card with shapes cut out to cast interesting shadows and help shape the light as Skyler mentioned here. Manipulating and shaping light is a crucial skill for a food photographer and one of my favorite lessons to teach inside my signature program, Portfolio to Profit. Find out more and apply here. |
Tip 7: Get outside your head–and your comfort zone
Lastly, Skyler suggests that all beginner photographers stretch themselves by taking photos that are beyond your skill level, which is your comfort zone. This is because there's so much to learn even as a professional, full-time photographer.
You can start by doing test images and searching for images that have a particular style, such as food in motion, icing that is poured halfway or splash photography. Find something you have never done before and try to deconstruct that image.
If you want to have an assignment, look for a photo that is completely out of your skill level. Pick a photo that completely mesmerizes and terrifies you at the same time. Challenge yourself by recreating that photo of this weekend, or set yourself a monthly challenge.
Whether you go online, figure out the techniques that you need to learn, or read books about photography at the library, this challenge stipulates that you do whatever it takes to make something very similar using the same technique in the photo you’ve chosen.
If you are ready to level-up your food photography skills and knowledge and learn from the best in the industry, don’t miss the annual Master the Art of Food Photography Summit happening soon!
Click below to learn more – if the summit isn’t open for sign-ups now, be sure to add your name to the waitlist so you won’t miss a moment of the next summit.


Hi, just required you to know I he added your site to my Google bookmarks due to your layout. But seriously, I believe your internet site has 1 in the freshest theme I??ve came across. It extremely helps make reading your blog significantly easier.
One thing I’d like to reply to is that weightloss program fast can be achieved by the perfect diet and exercise. An individual’s size not simply affects appearance, but also the quality of life. Self-esteem, melancholy, health risks, and physical ability are damaged in excess weight. It is possible to just make everything right whilst still having a gain. If this happens, a problem may be the reason. While too much food instead of enough body exercise are usually the culprit, common health conditions and widely used prescriptions may greatly increase size. I am grateful for your post here.
Thank you for sharing indeed great looking !
Thank you for sharing indeed great looking !
Thank you so much for sharing this wonderful post with us.
Thanks for providing actionable tips in your post. They’re practical and easy to implement. I can’t wait to try them out!
Your support is invaluable to us. Thank you for reading and being part of this incredible journey!
I’m not sure exactly whhy bbut this blog is loazding exstremely slkw forr me.
Is anyone eose having this isssue oor iss it a prooblem
onn mmy end? I’ll check back later on and see if
thhe problem sill exists.
Hi thwre tto all, it’s eally a pleaant forr me to visit thhis site, iit consijsts off imporgant Information.
Heya! I just wanted to ask if you ever have any issues with hackers? My last blog (wordpress) was hacked and I ended up losing months of hard work due to no back up. Do you have any solutions to protect against hackers?
Hello there, I found your website via Google while looking for a related topic, your website came up, it looks great. I’ve bookmarked it in my google bookmarks.
You’ve accomplished a fantastic job, and the material you’ve created is articulate and creative. However, you seem concerned about the prospect of presenting something that is deemed to be questionable. I believe you’ll be able to clean up this mess in a matter of minutes.
Your talent is equal to your own inspiration. Giustino’s artwork is tasteful, and the written content is properly arranged. Despite this, you feel uneasy about the prospect of embarking on something that might cause you discomfort. I concede that you will be able to address this problem quickly.
Lirigzon Gashi
I’ve been shooting food images for some time, and I like to improve on my styling and presentation.