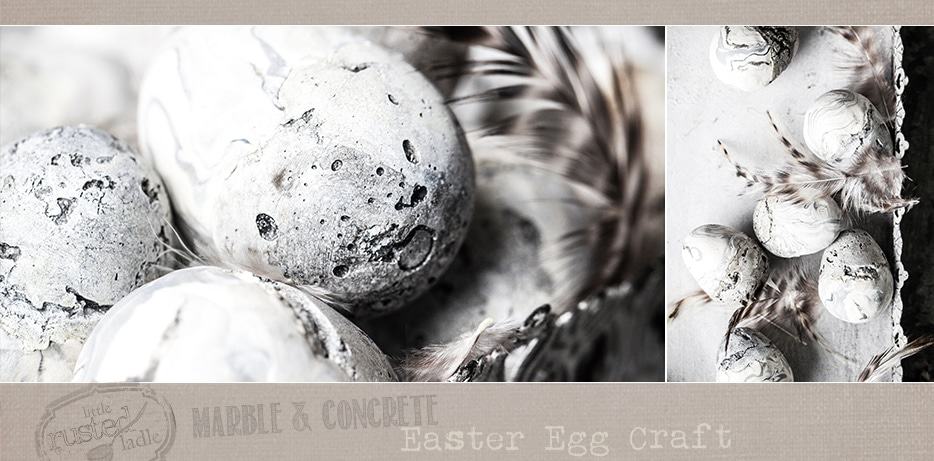
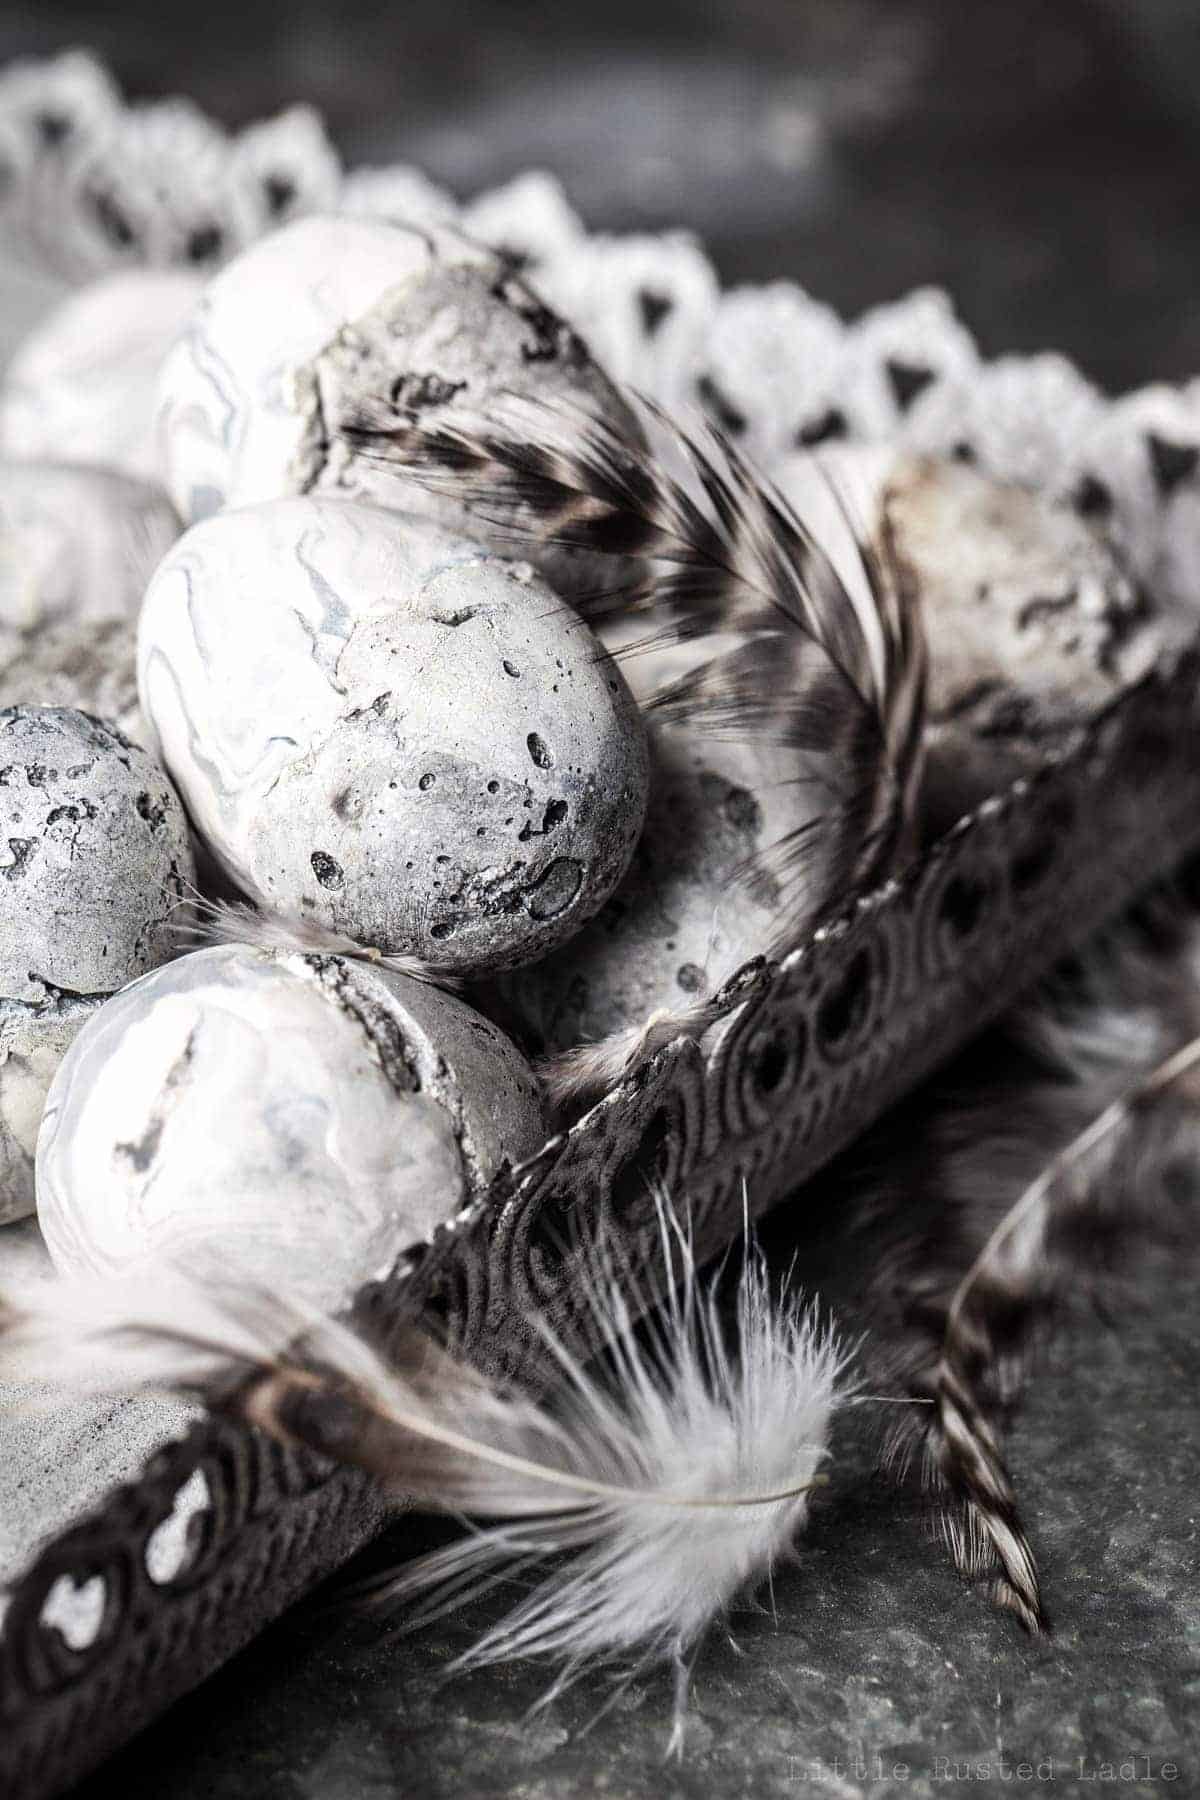
Here we go! I have been thinking A LOT about our Easter decor this year. I am so excited to share with you what we came up with… Clay-marble and concrete Easter eggs!
You will need:
Plastic eggs for molds
Concrete mix
Grey paint
Oven-bake clay (white, grey and Black)
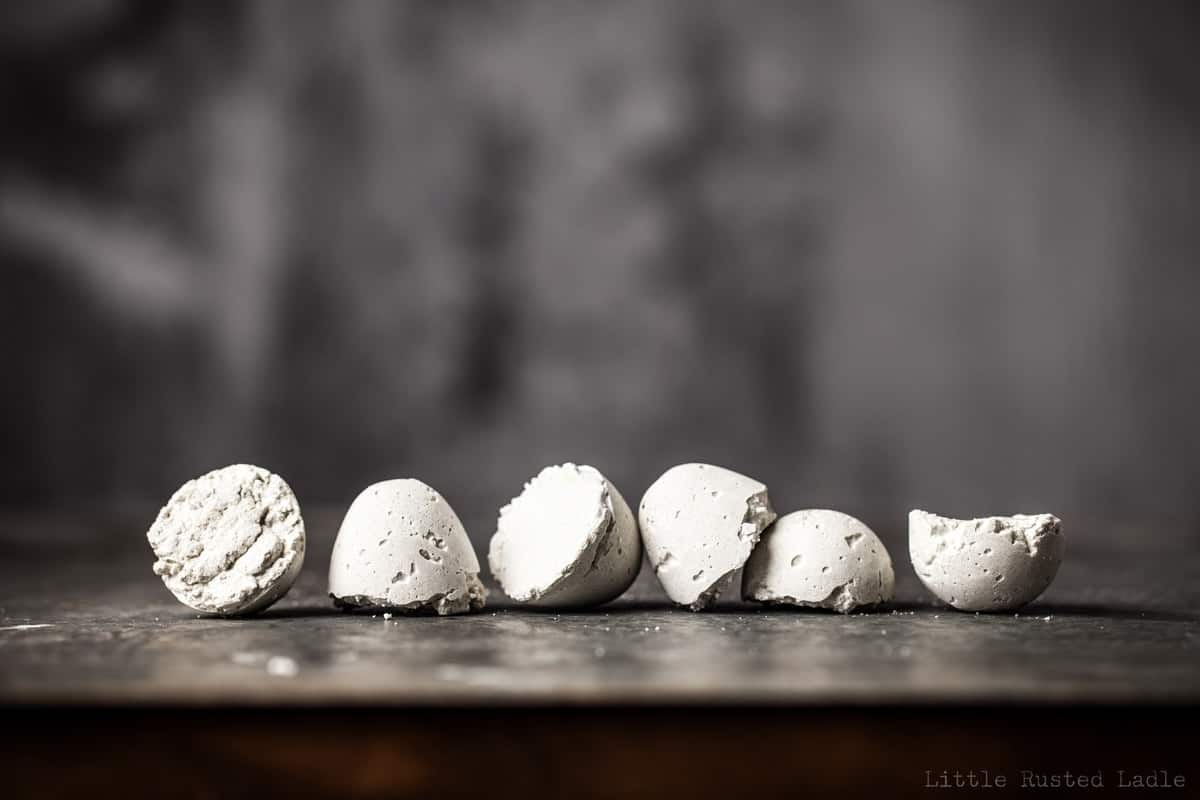
1. Start stirring water into the concrete to achieve a somewhat crumbly mixture. Loosely pour the mixture into the plastic Easter egg halves. Do not fill completely and leave a rough edge. Do not let it harden all the way, or it will be difficult to remove. I tapped mine out of the mold after a few hours.
2. Grab a large chunk of white clay, one-fourth piece of grey clay, and just a pinch of the black clay. Roll out the white clay into three pieces, the grey clay into two and the black into one. Pair each white piece with either a grey or black piece of clay.
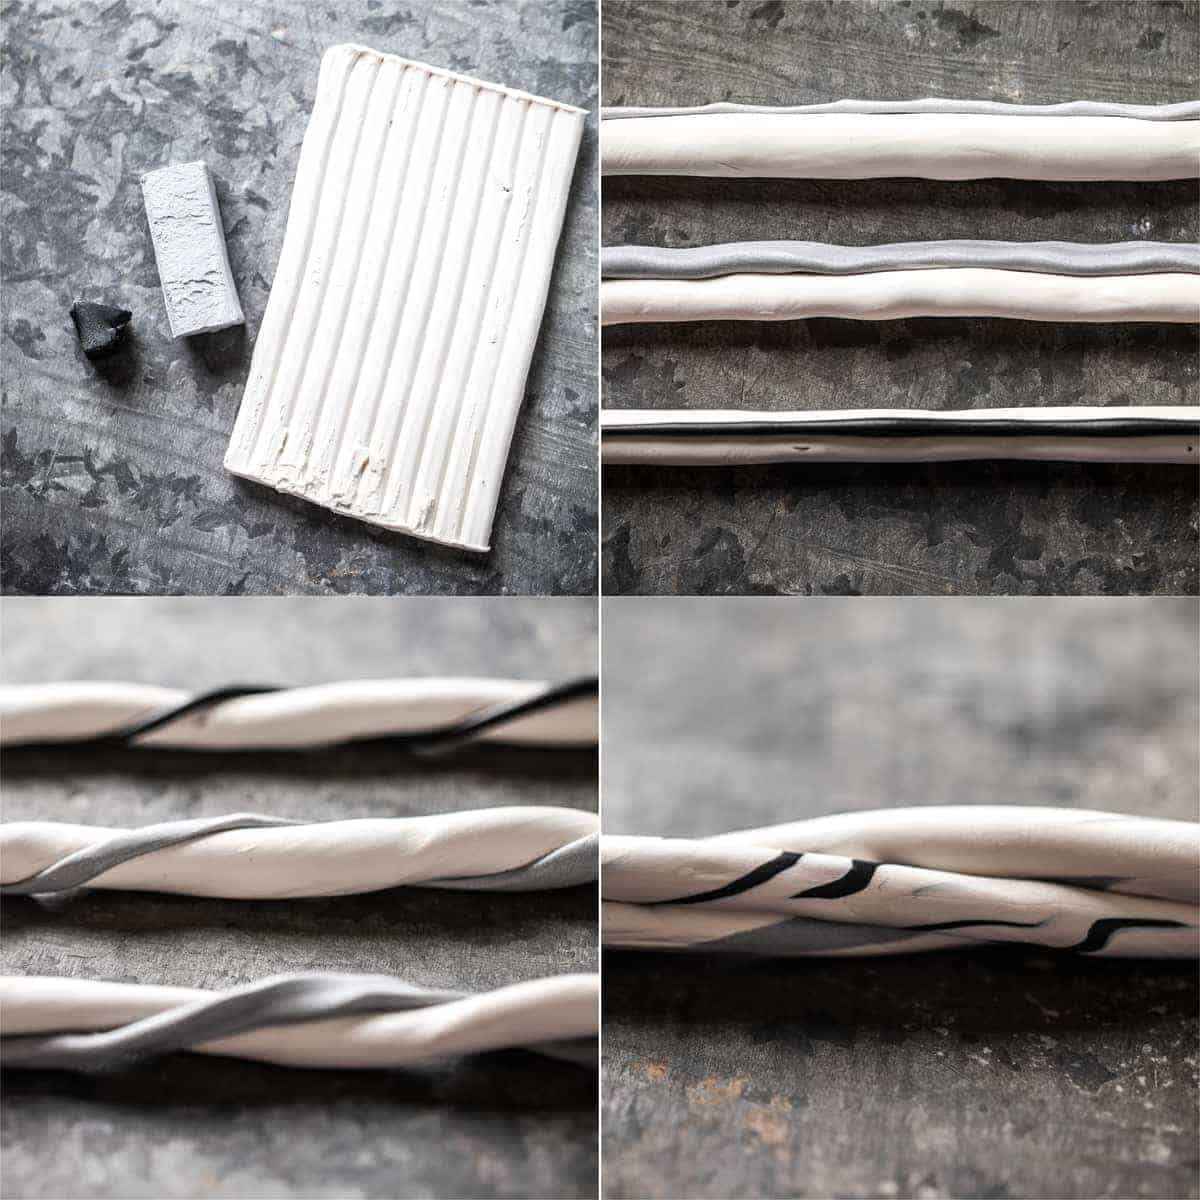
3. Roll and twist all three pieces separately. Fold over, twist and roll three more times.
4. Join the three pieces. Twist, roll, fold and repeat three times and then coil and smash them together in a ball.
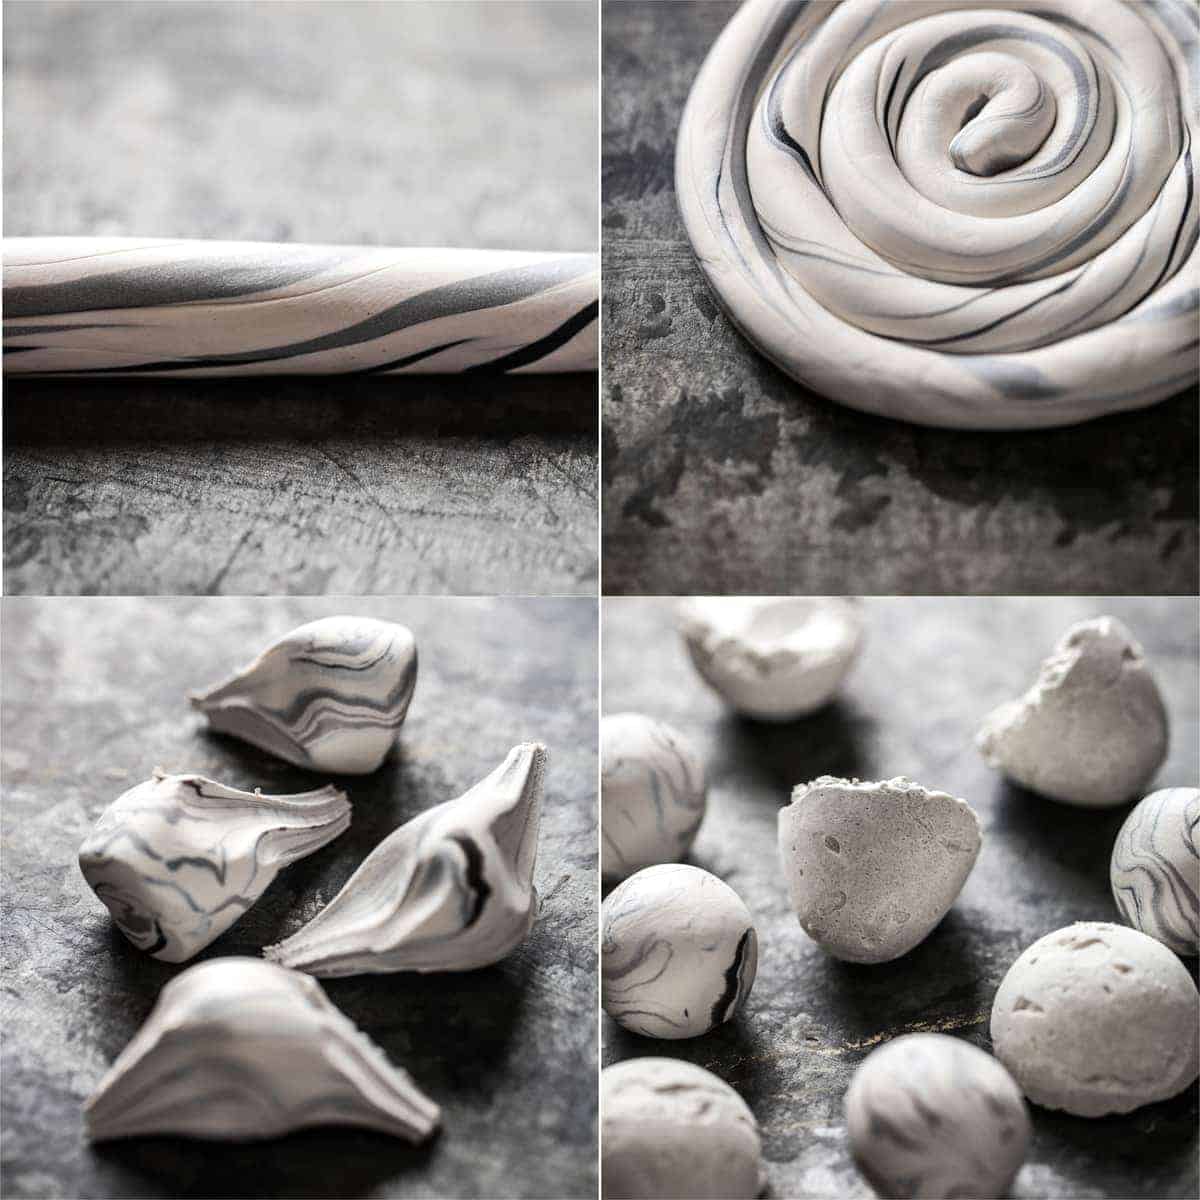
5. Divide the clay into four equal parts and roll them into balls.
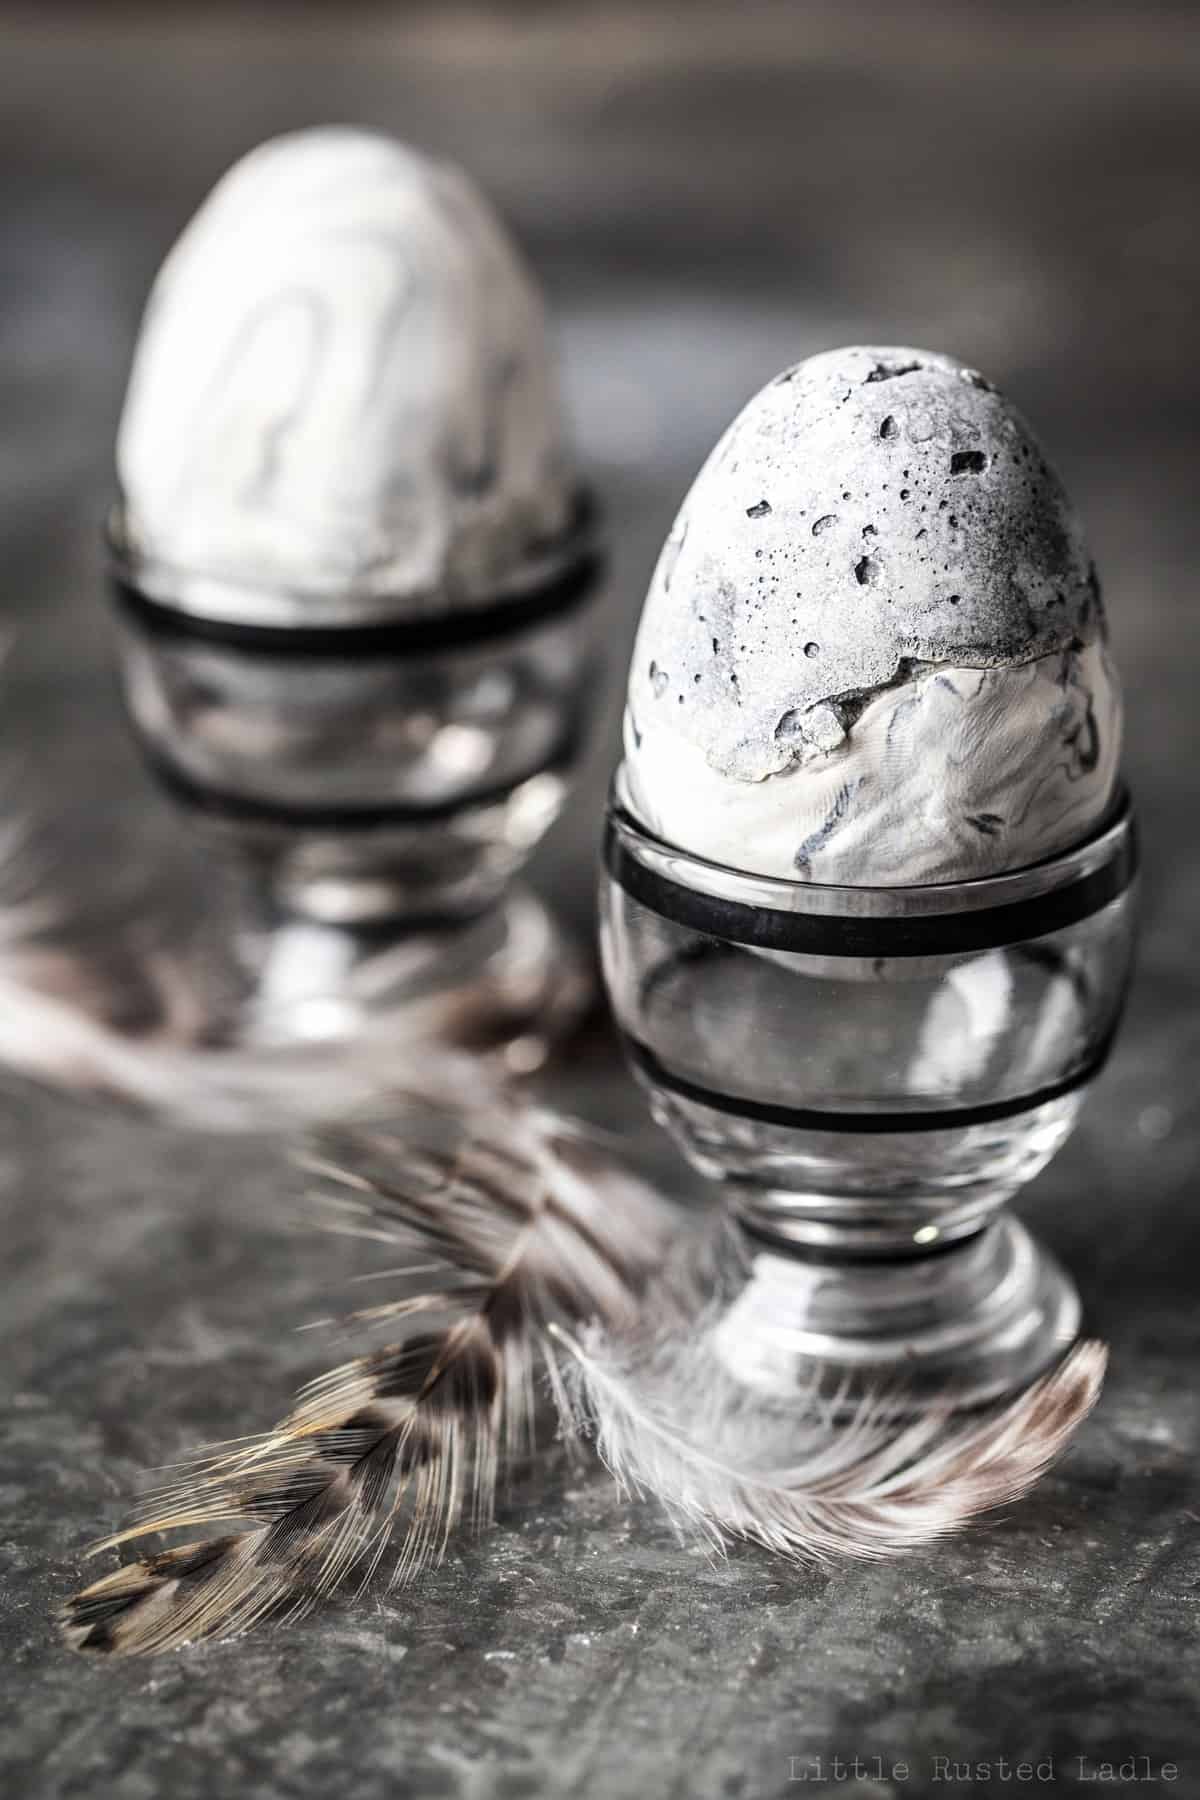
6. Take a ball and make a mini pinch pot. Cup it around the dried concrete end and smudge together.
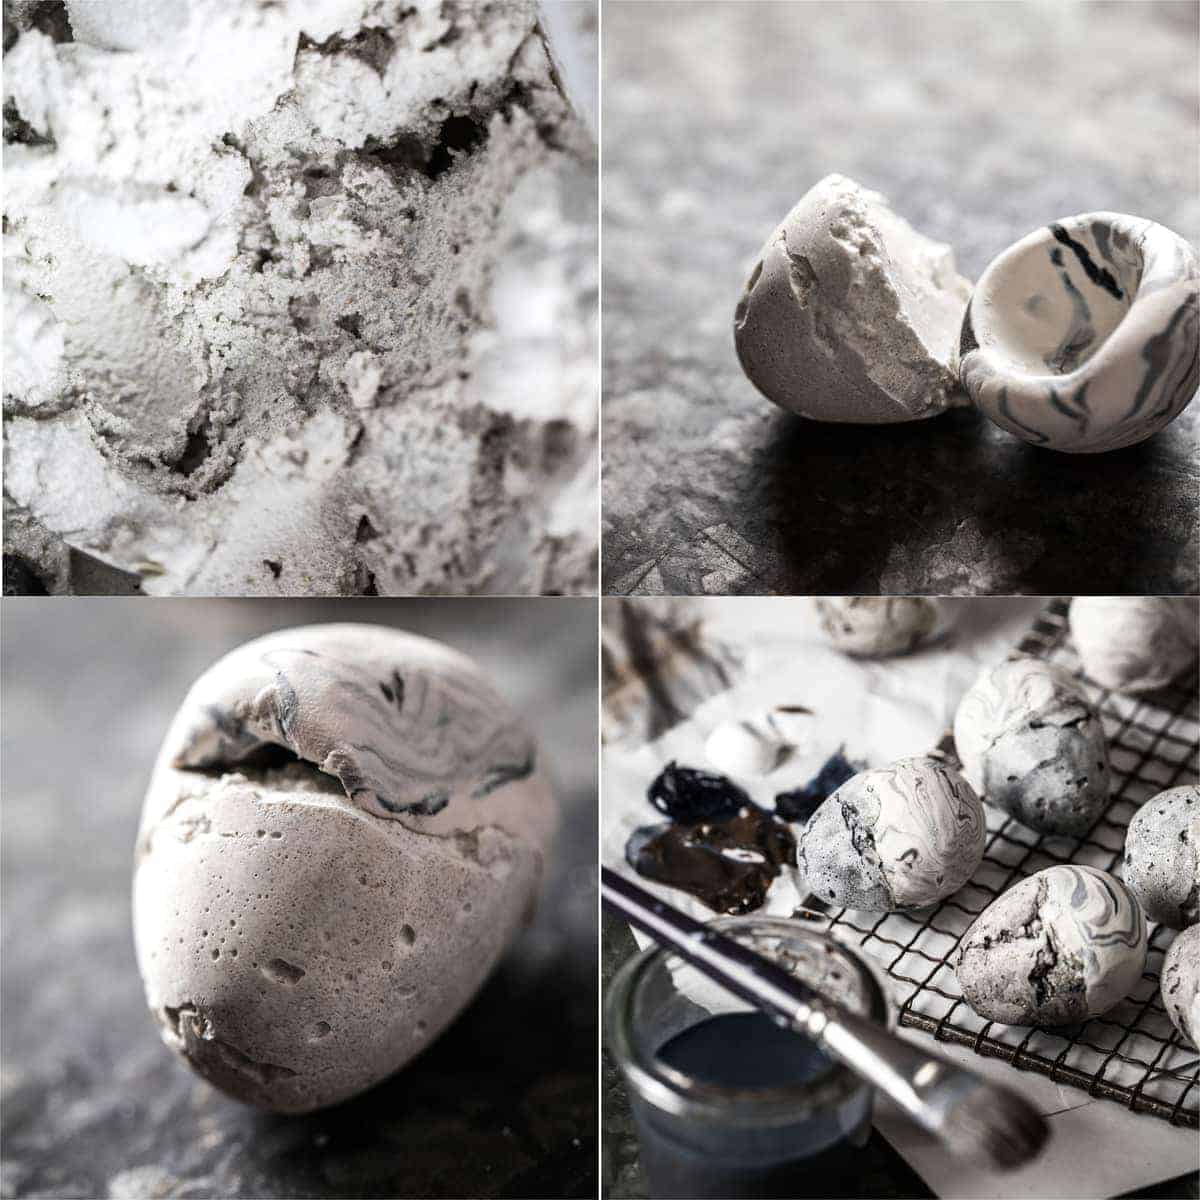
7. Bake per your oven-bake clay instructions, or for 30min at 375 if it does not specify.
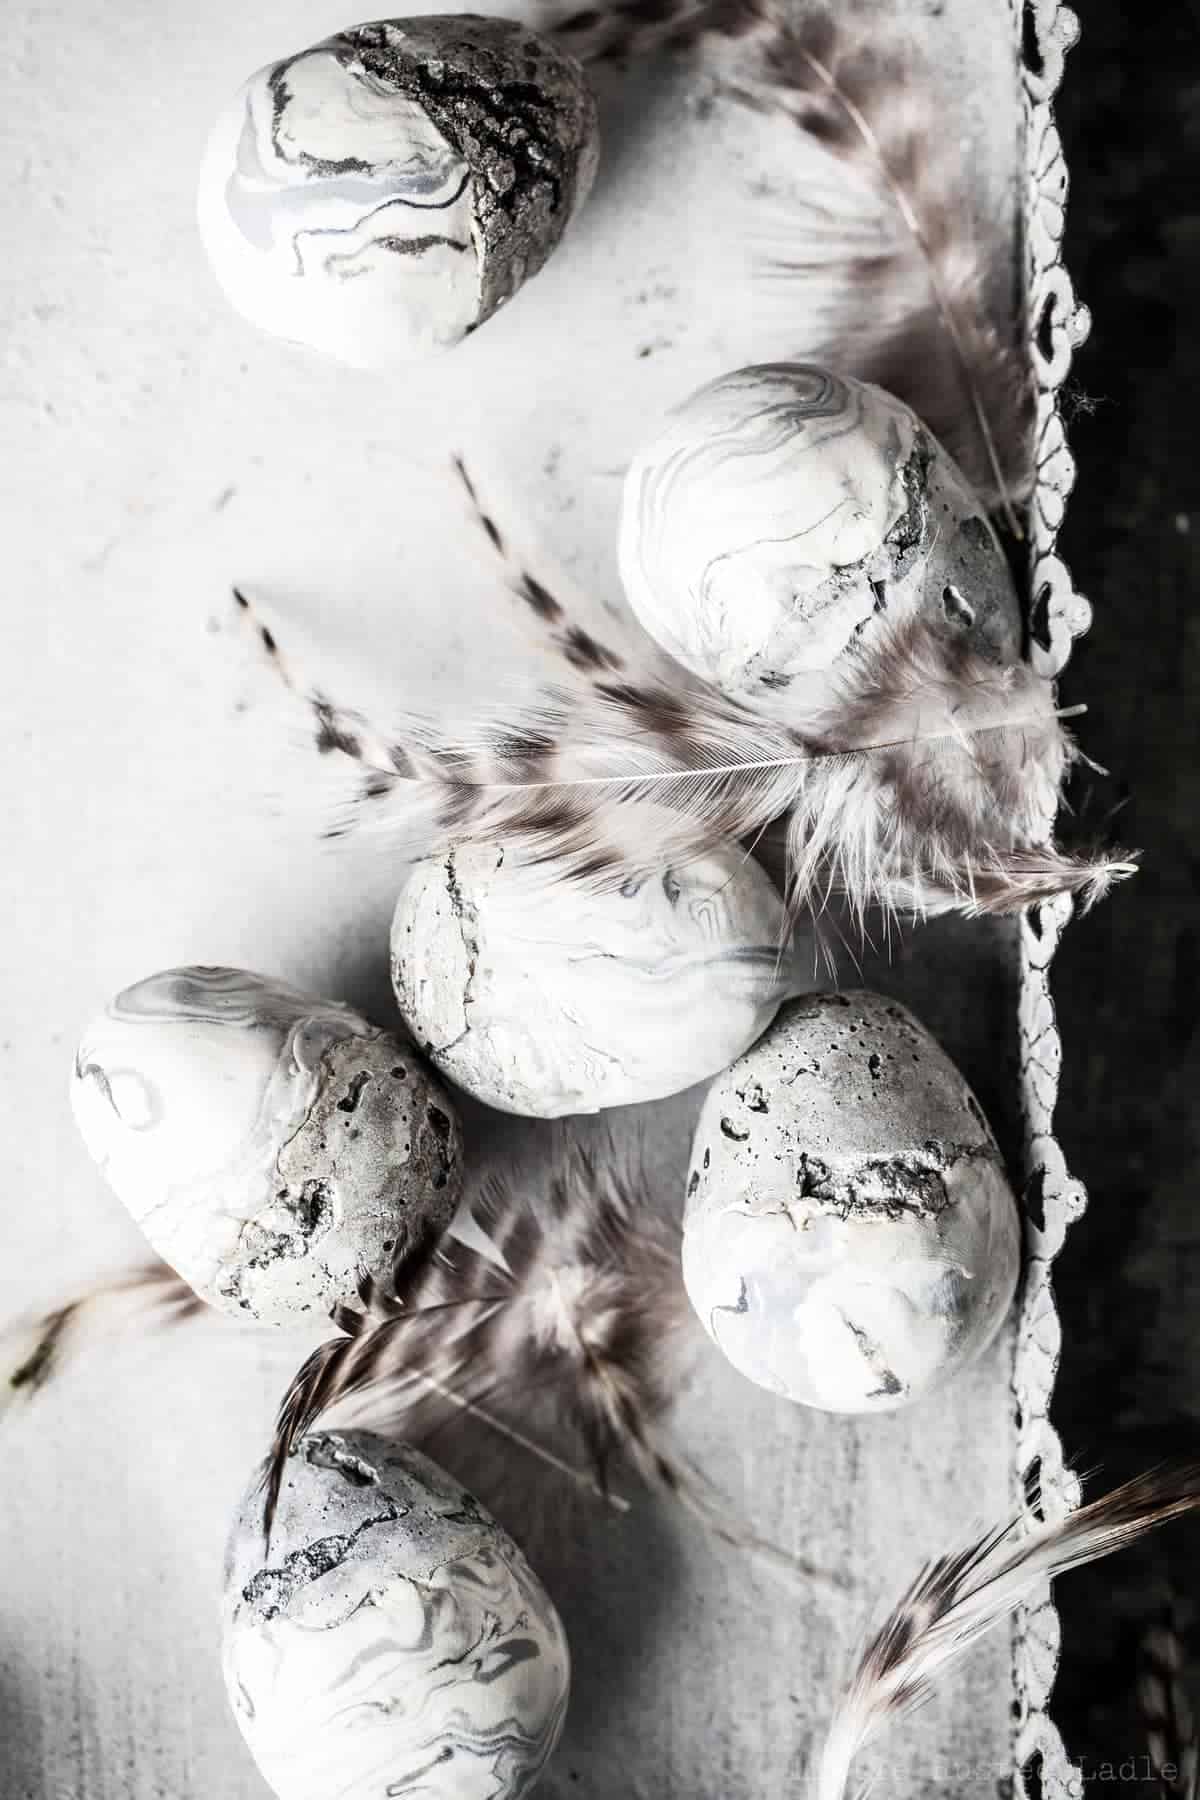
8. Mix some grey paint and water. Wash the paint over the concrete and you are done!
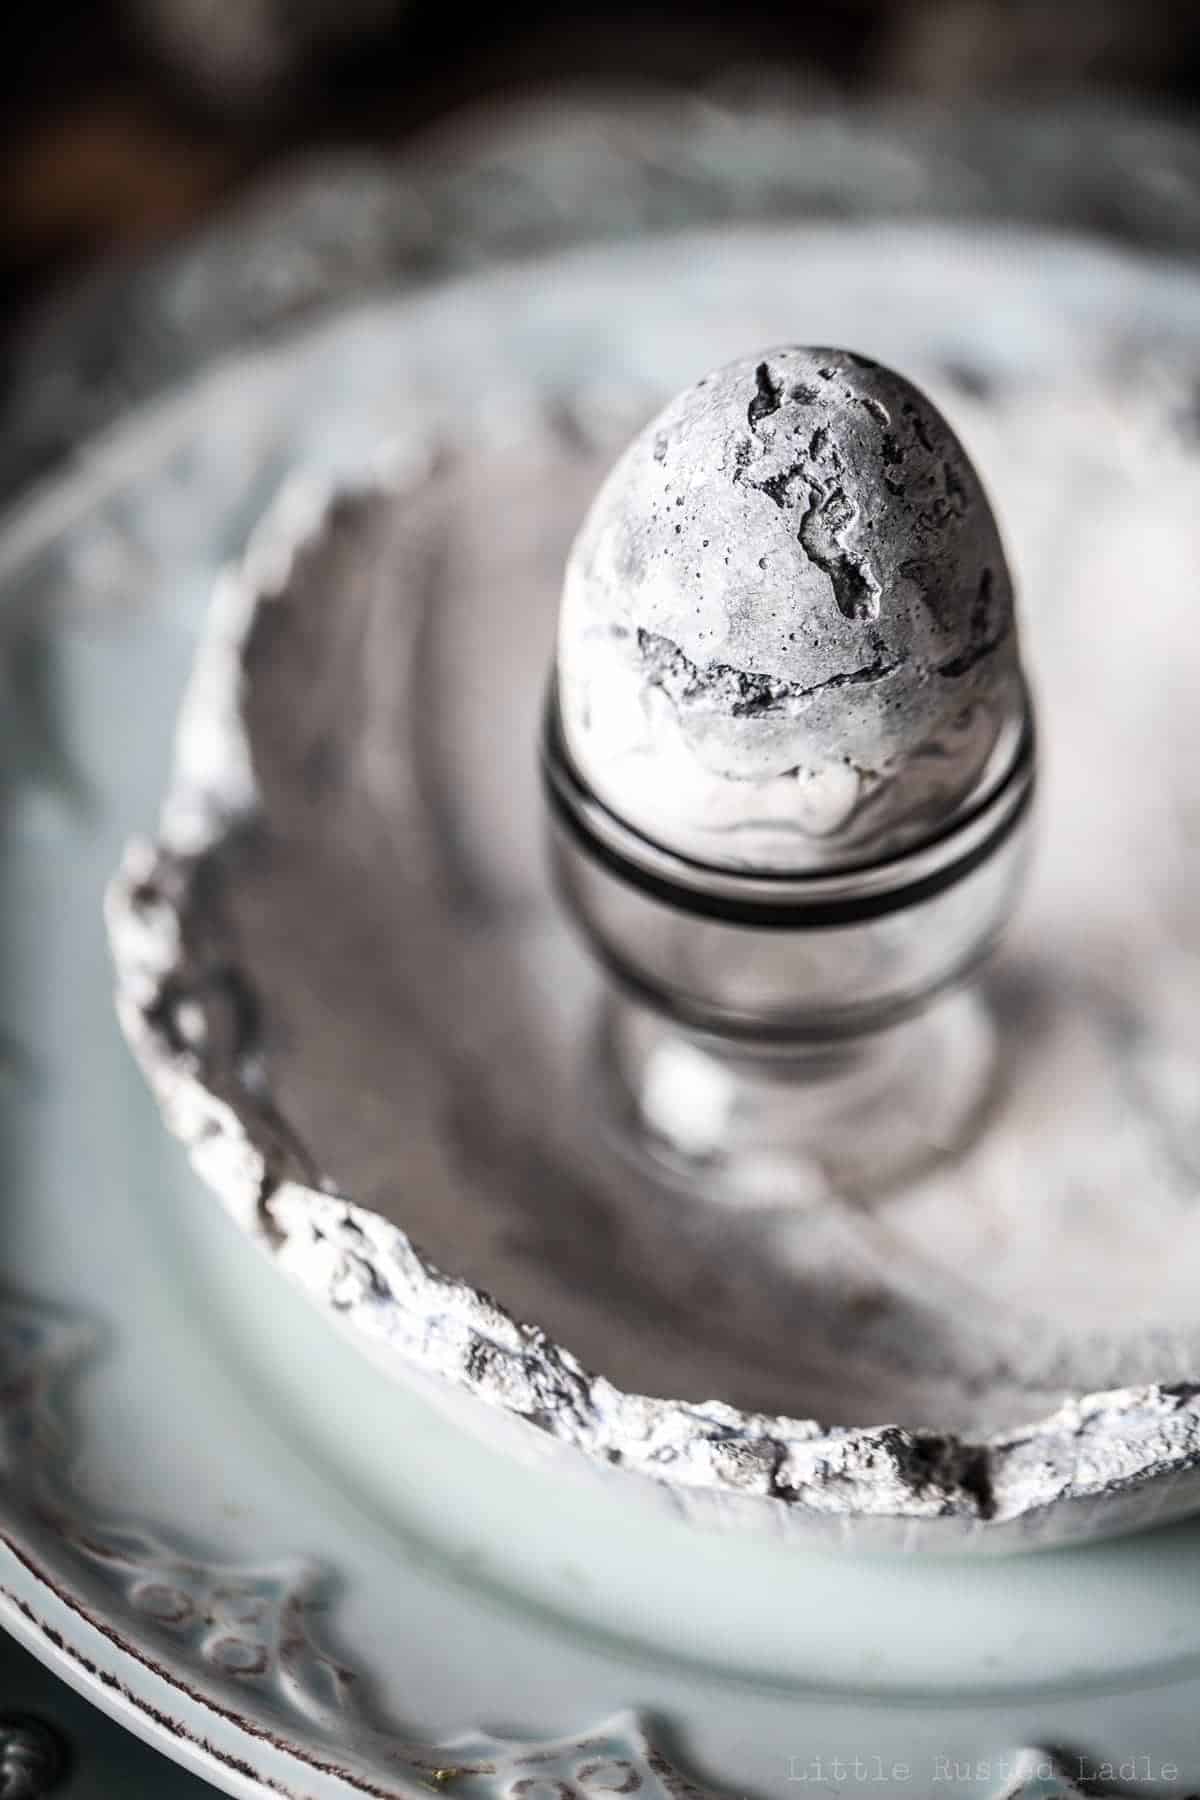
Stay tuned for more this week on our intriguing mix of concrete and marble Easter tablescape.
Thank you for checking out our latest entertaining post. until next time, don't wait for a special occasion – create one!
Jena and Jim


What a fantastic idea!!! Those eggs are beautiful. 🙂
You come up with the most brilliant ideas! These are gorgeous!