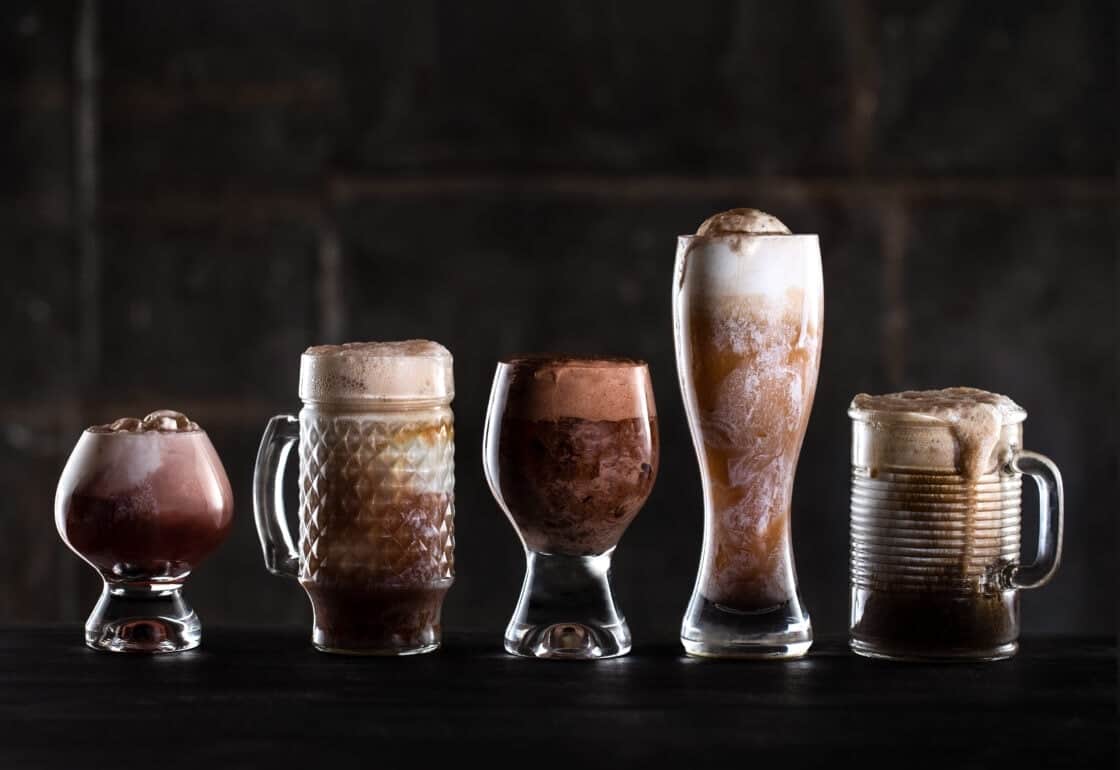
I have been a professional photographer in the food and drink commercial photography industry for more than ten years. National and international brands trust me to make their products stand out. And the right knowledge can catch the eye of potential clients. Today I am serving up my expert tips on how we made this spectacular beer floats image!
You can see more examples of my commercial photography portfolio on my website, Jena Carlin Creative.
Jim Rude is an extremely talented food and beverage stylist I have worked in the photography business with for many years. Check out his extensive portfolio on his website, Rude on Food.
Work, then play!
Jim and I were excited to work on this Beer Float shot after a long video shoot for our client Saputo Foodservice. We made a delicious Goat Cheese Spinach Artichoke Dip with their Stella brand cheeses, and the how-to video turned out great!
Then we got down to business, with a fun beer float shoot featuring unique glassware props and dramatic lighting.
Step One: Planning the Photoshoot
For planning this on-location shoot I collected all of my beer glass options, ice cream scoops, and surfaces from my prop storage room. I already had a variety of other props and surfaces packed up for the other shoot and a clear idea of the art direction we wanted. Jim bought the ingredients in the morning, chilled them during the day, and we were ready to shoot immediately after the commercial food photography job.
Check out this article if you'd like a peek into my typical food photography studio setup!
Step Two: Composing the Glasses
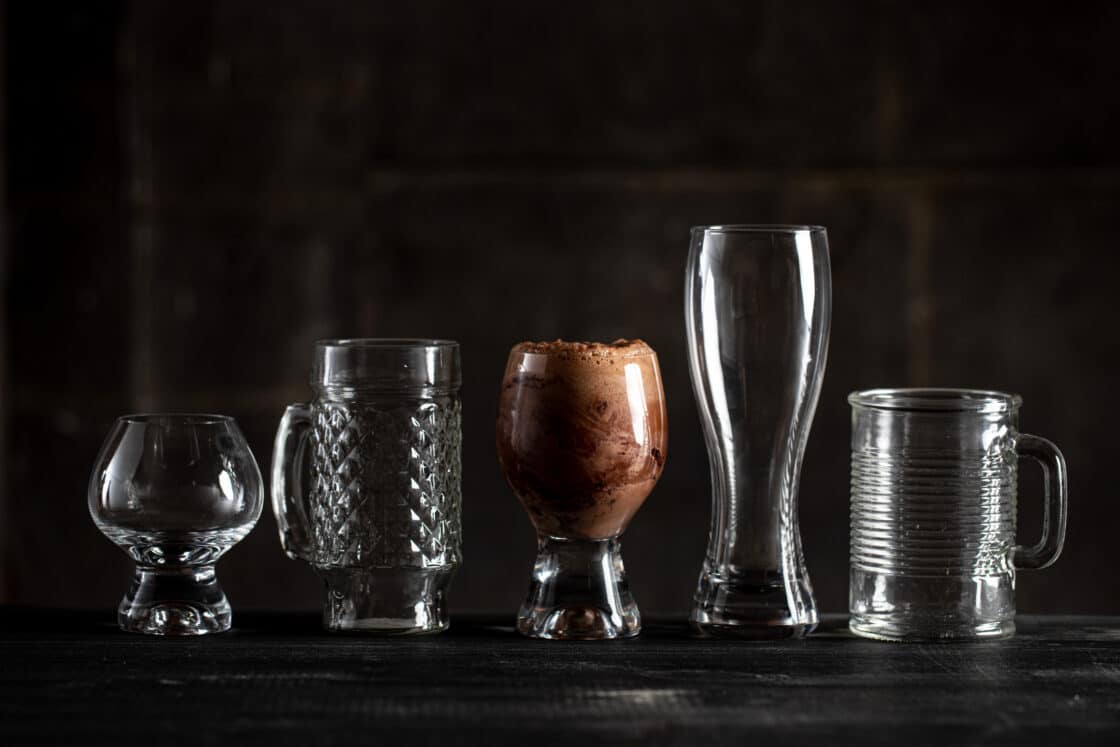
We started out by styling a variety of eclectic glasses to get the composition just how we wanted it. Once we had that nailed down we marked the position of each glass with a pencil on the surface.
While the food is going to be the star, everything around the food goes a long way toward selling the product. Lighting, props, composition, angle, and many other components go into a shot like this.
Step 3: A Little Light on the Subject
To control reflections and glare, I set up the light lower than the table and behind the subject matter. The light softy wraps around the right side of the glass while the left side has a striking sidelight. Coupled with the dark surface and backdrop, this makes for a super dramatic shot.
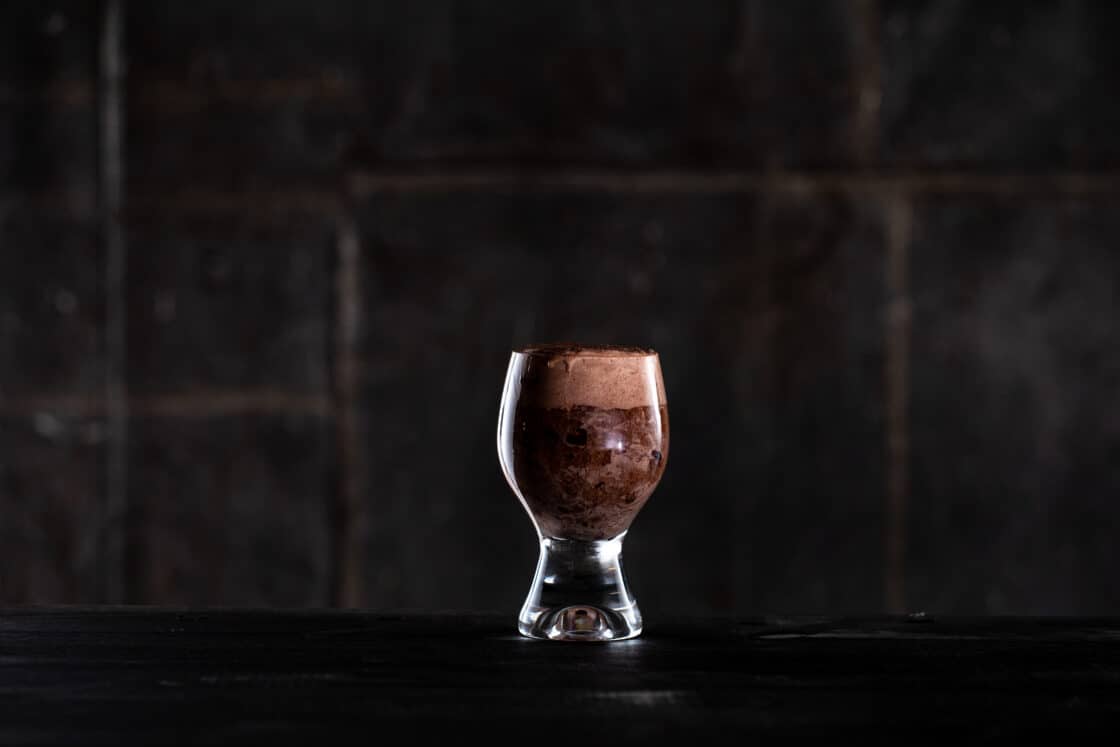
After the lighting was set, we took all of the glasses away except for one. Jim and I started with the middle glass, thinking we could build our shot out from the center.
We agreed that we would need to take this shot in stages to get the best beer foam and ice cream styling for each beer float.
Time is often an essential component of product photography shots. Ice cream melts and beer head only hangs around for so long! This tip can be true a surprising amount in the food photography industry, from melted cheese to bubbly champagne.
Step 4: Trial and Error
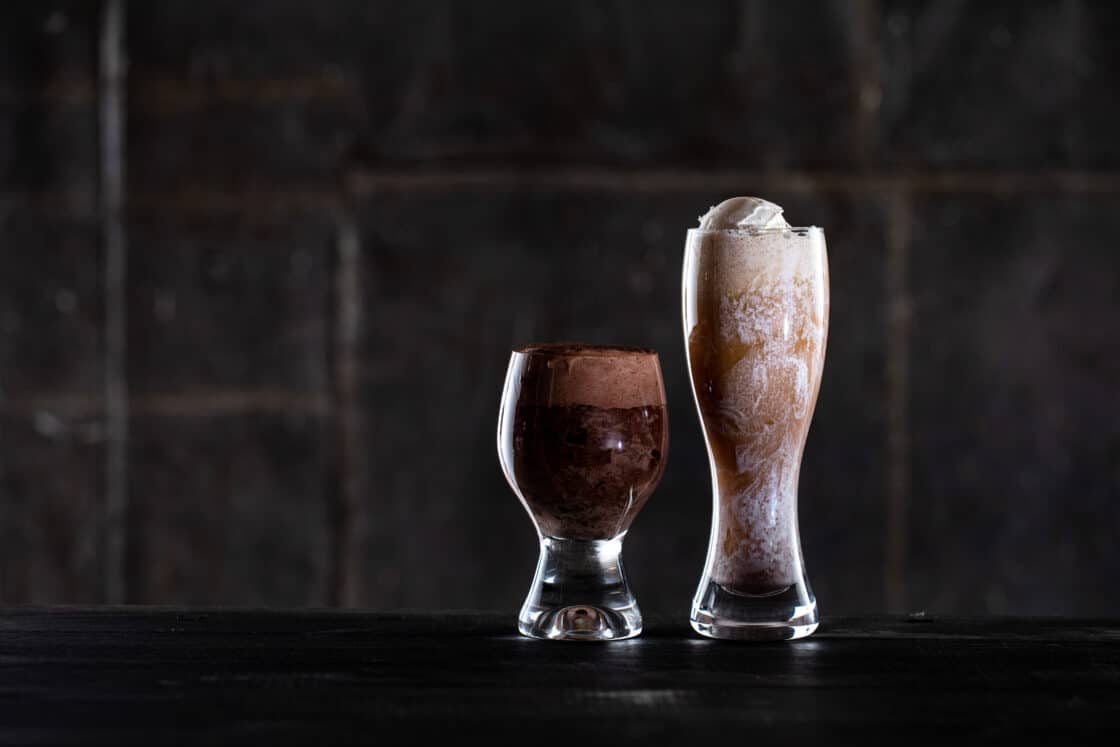
We planned on adding each glass as we came to it, but quickly noticed that the first beer float blocked the striking light from the left. While shooting all of the glasses together would have been a more natural approach, the commercial photographer in me wanted the perfect highlight. Therefore, we decided to shoot each float separately and merge the photos later into one final image.
This is where our original pencil marks come in. As long as each float stays in place and the lighting source doesn't change, it's pretty easy with today's photo editing software to combine each glass, with highlights intact, into one stunning photo.
Step 5: Executing the Plan
Drink styling involves a solid plan with a speedy time table. To get the best results, it's important to do everything you possibly can to have the photo exactly right before bringing the food into the picture. Especially if it's the type of food that melts, browns quickly, or needs to keep a good sizzle.

Once you are ready, take the ice cream out of the freezer and twist the top off of your beer. Style the ice cream and beer on set and take pictures as you go. Then you can make sure the position is correct and you are capturing the food at its best.
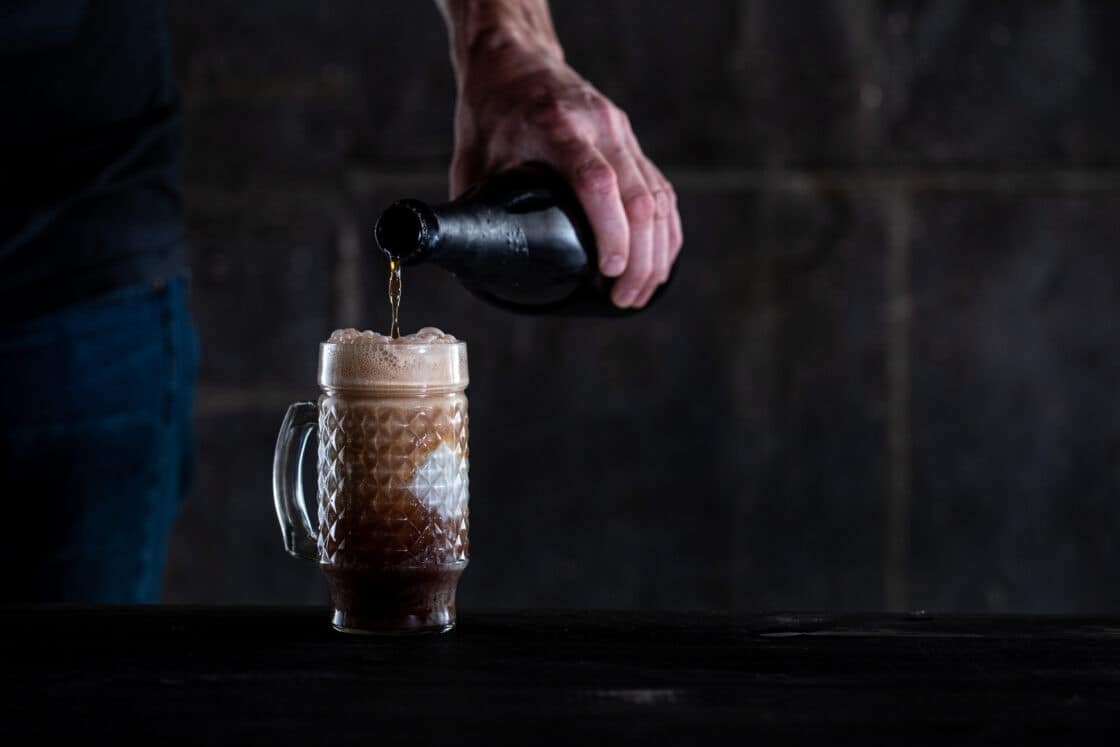
To get the really great foam in the shot above, we took action shots while the pouring beer was stirring up the bubbles. Sometimes action makes all the difference!
If you don't want a body in the shot, you and a friend can work on a quick, clean pour before they hustle out of the shot and you snap the picture. These tips can be a fun exercise in patience and precision.
Step 5: Editing and Retouching Tips
A good rule of thumb on set is to tweak the image physically when possible until that tweaking takes significantly longer than it would to fix the same thing in Photoshop.
When I'm working in a room set for a client, we keep an eye on the nail holes. Walls in a photo shoot are repainted and reused, including hanging artwork and props. If there is only one or two holes in the wall, they can be fixed after the fact. However, once the wall becomes so holy that Photoshopping them out would be a large time investment, it's best to fill them all and repaint before shooting.
In the case of this shot, I ended up having five images to merge together to achieve the lighting effect I was after. I also removed dust, cleaned up any reflections of my equipment in the glass, and added an s-curve for contrast.
Check out this Instagram Story where I show an editing before and after! It's amazing what some slight editing can do to make a photo really pop.
Finished Product
To see how all of the shots turned out and to get the recipes to these AMAZING beer floats, check out the full article!
Looking for more photography tips? I've collected all of my best food photography tips over here.
There it is. A look into the life of commercial drink photography! Let me know if any of these tips help you out for your next social media post or even in work for a client. I'd love to hear about it below! Don't wait for a special occasion, create one!
-Jena

I’m not that much of a online reader to be honest but your blogs really nice, keep it up!
I’ll go ahead and bookmark your site to come back later on. Many thanks
Hi there, I found your web site by way of Google even as looking for a related
matter, your site got here up, it looks good. I’ve bookmarked it in my google bookmarks.
Hello there, simply was aware of your blog via Google, and found that it’s truly informative.
I’m gonna watch out for brussels. I’ll appreciate in case you proceed this in future.
Numerous other people will be benefited from
your writing. Cheers!
For most up-to-date news you have to pay a visit world-wide-web and on the web I found this website as a most excellent site
for most up-to-date updates.
Greetings from California! I’m bored to tears at work so
I decided to browse your site on my iphone during lunch break.
I enjoy the info you provide here and can’t wait to take a look when I get
home. I’m amazed at how fast your blog loaded
on my cell phone .. I’m not even using WIFI,
just 3G .. Anyways, superb site!
whoah this blog is great i like studying your articles.
Stay up the good work! You understand, a lot of individuals are hunting around for
this info, you can help them greatly.