Let's Make an Easy DIY Red Polka-Dot Mushroom Craft from Dried Orange Peels!
An Affordable, Natural Craft for Your Tablescape
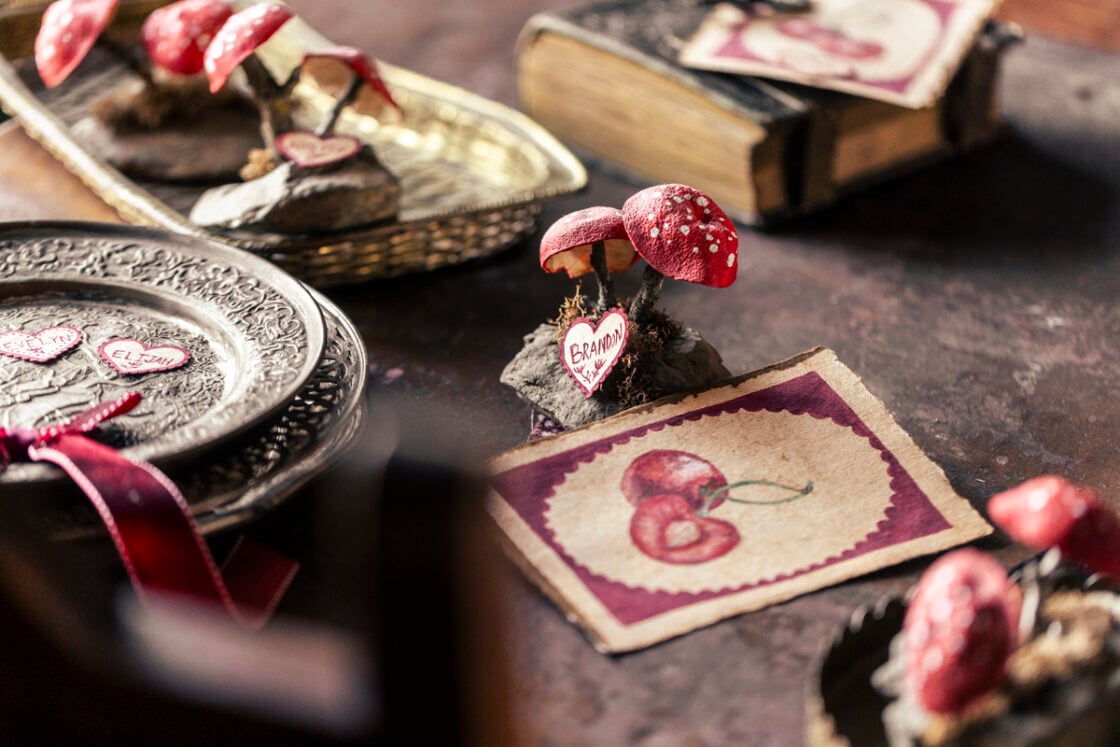
If you love whimsical, nature-inspired decor, these DIY red polka-dot mushrooms are the perfect addition to your tablescape. Made from dried orange peels, wood sticks, rocks, moss, and craft paint, this budget-friendly craft brings a magical toadstool touch to any setting. Whether you’re hosting a cozy dinner, decorating for a woodland-themed event, or adding a handmade accent to your seasonal decor, these mushrooms will be a charming conversation piece. While these can be enjoyed all-year-round, it will be especially adorned within my valentines Day table decor!
Materials You’ll Need:
Tip: Gathering these materials is just as fun as making the craft itself! Turn it into a scavenger hunt with your kids—venture outside to find the perfect twigs, rocks, and moss while sparking their curiosity about nature.
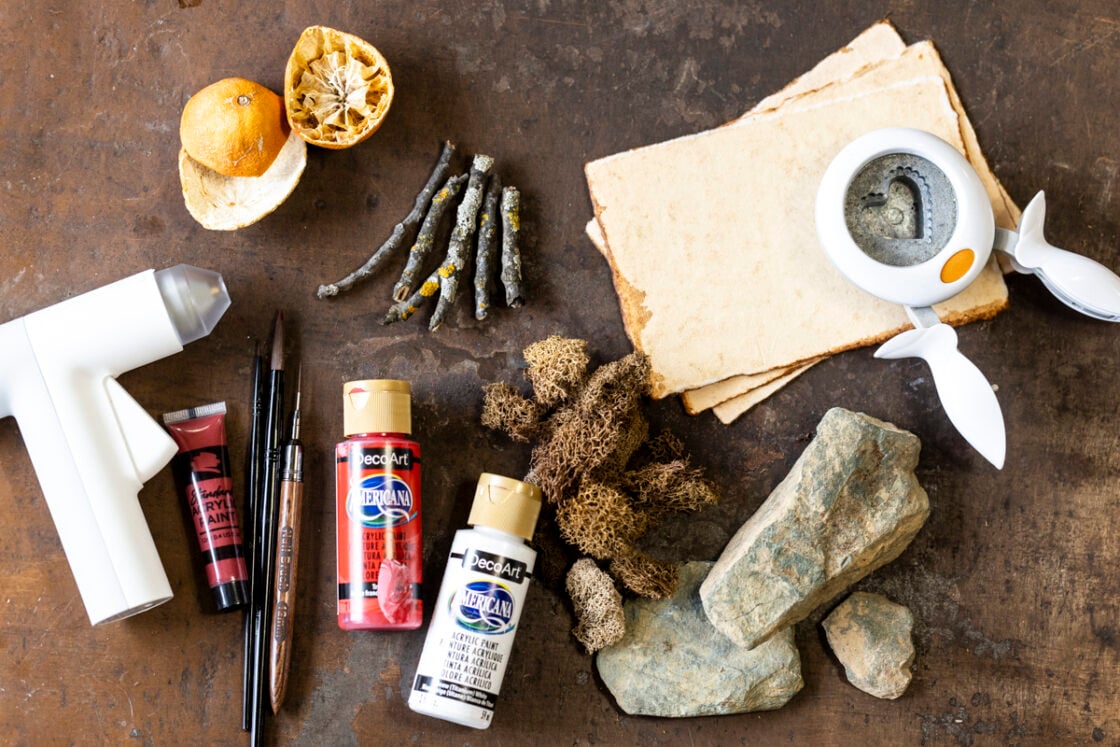
Material list for the red polkadot mushrooms:
- Dried orange peel (for the mushroom caps)
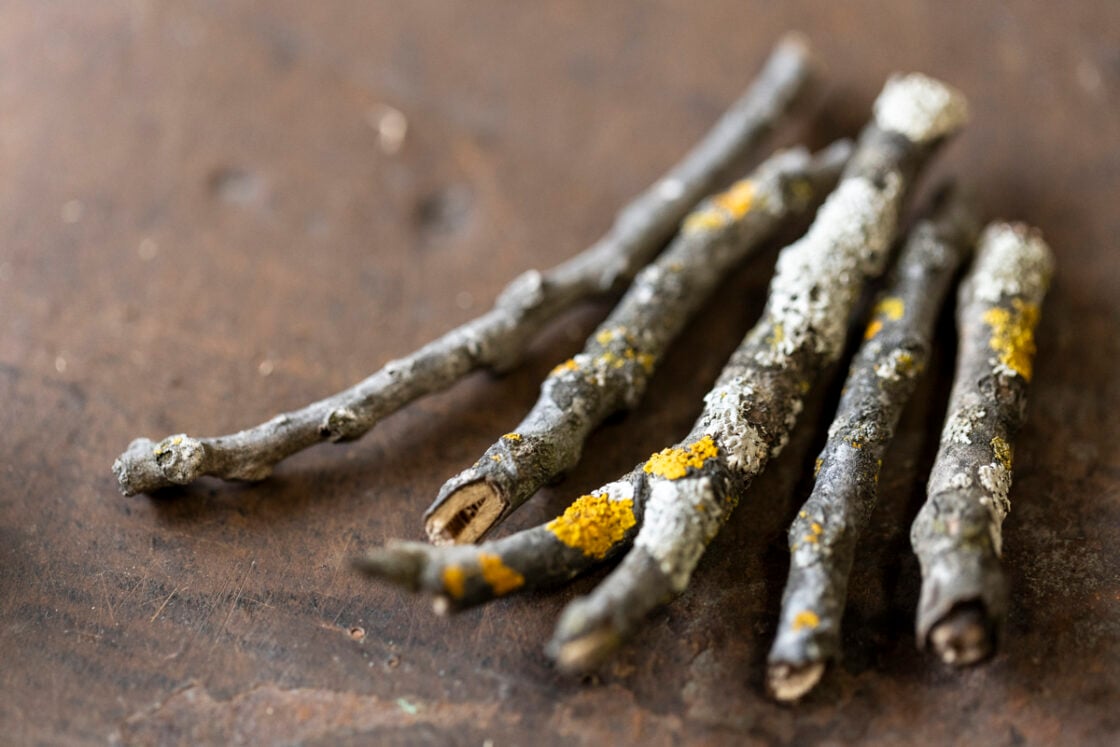
- Small wood sticks (for the stems)
- Small rocks (to help stabilize the mushrooms)
- Moss (for a natural touch)
- Red and white craft paint
- Hot glue gun and glue sticks
- Paintbrushes
Material list for the name cards (optional):
- 1-inch heart scalloped paper punch (Optional)
- Distressed vintage handmade paper (Optional)
- Red acrylic paint (Optional)
- Fine-tip paintbrush for writing names (Optional)
Step-by-Step Instructions:
Step 1: Shape the Mushroom Caps
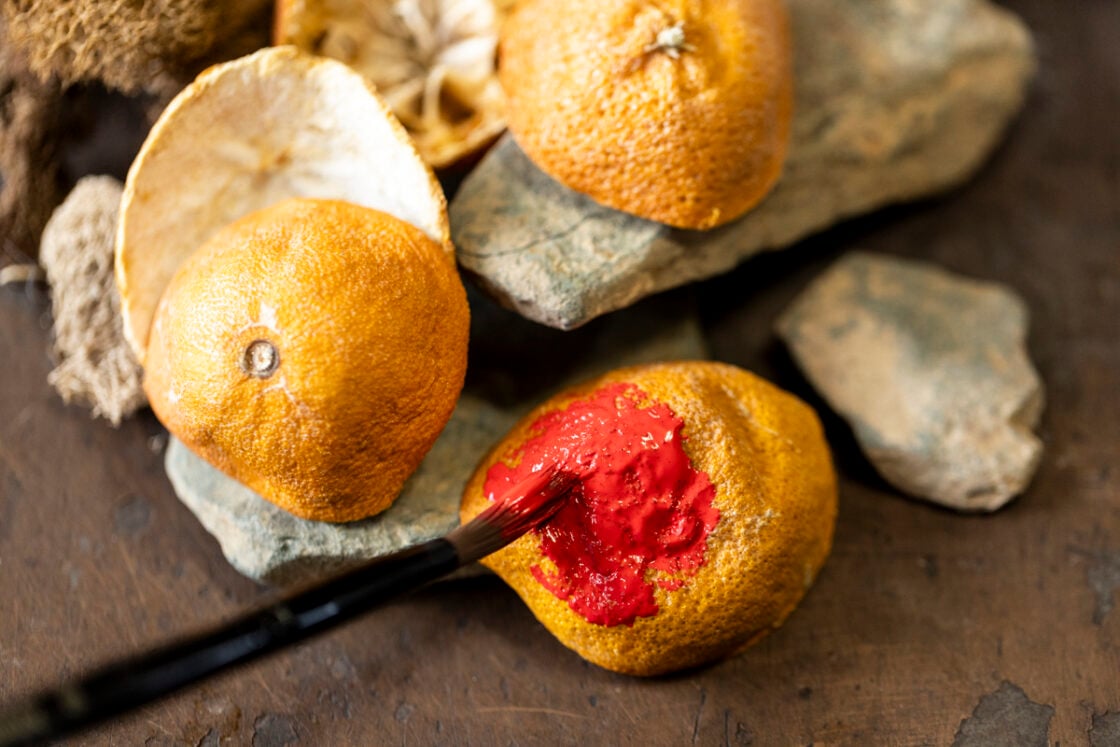
First, start by cutting Cutie oranges in half. These oranges are easier to peel then most. Peel them being carful not to rip them. The natural curve of the peel makes them perfect for dried orange peel mushrooms! Allow a few days to dry,
Step 2: Paint the Mushroom Caps
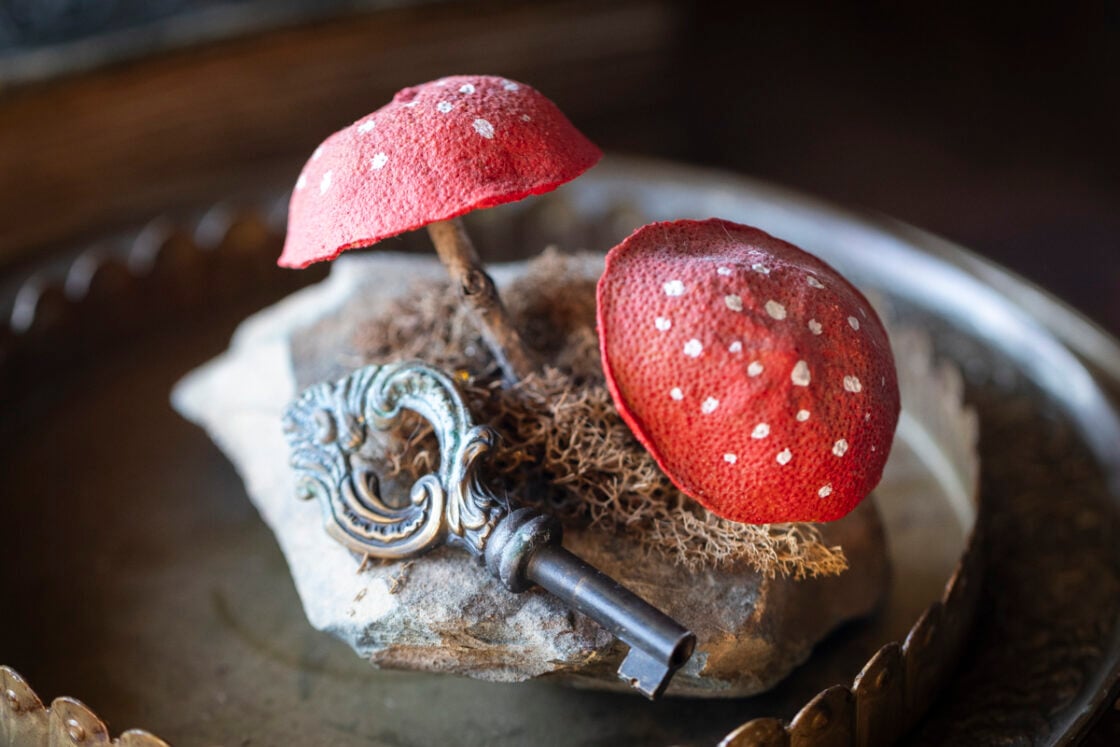
Once dry, paint the exterior of each peel bright red using craft paint. I did two coats so the color looks solin and did not have painting streaks. Let it dry, then add small white polka dots with a fine brush or cotton swab. This will give them that classic toadstool look!
Step 3: Create the Mushroom Stems and Assemble the Mushrooms
Break or cut small wood sticks to the desired length for your mushroom stems. Use a hot glue gun to attach each painted orange peel cap to the top of a wood stick. Hold in place until secure.
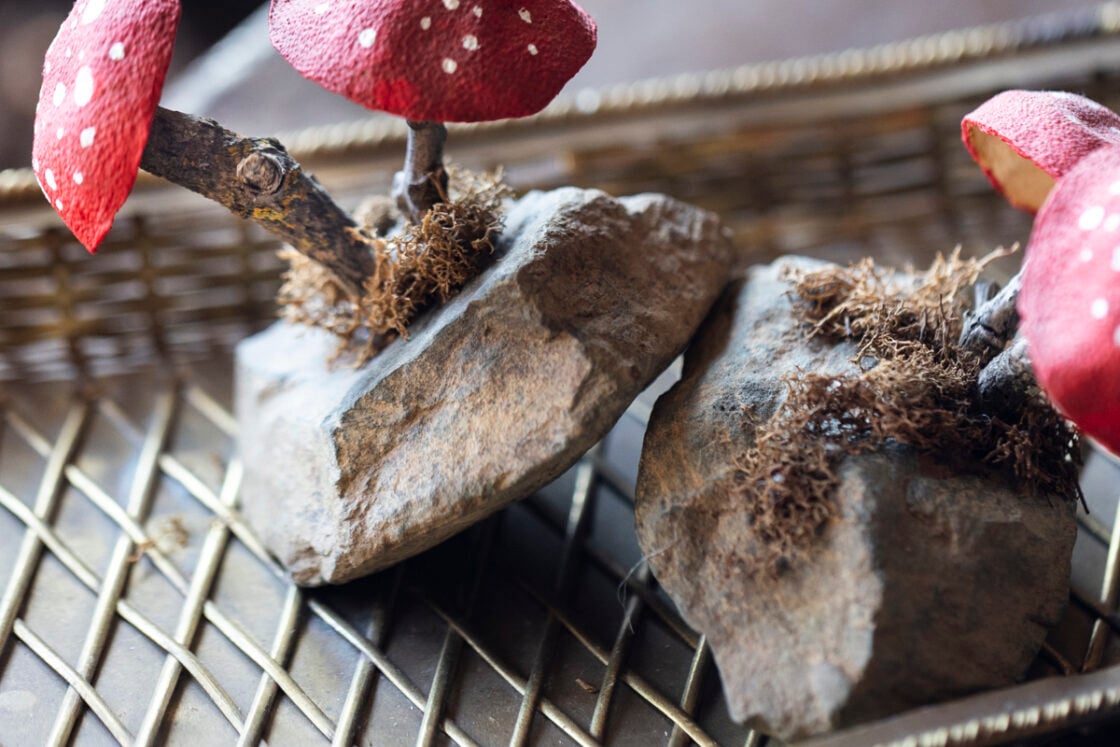
Step 4: Next Add Moss and Secure the Base
Place moss on the rock where you want it to go and hold it down while hot gluing the stick onto the moss and small rock. The glue should hold it all together, but if not, add more glue between the moss and rock. This will help your mushrooms stand upright on your tablescape. From here you can choose to add in more moss. Arrange moss around the base of the mushrooms to create a woodland effect. You can glue it down or simply tuck it around the rocks.
Step 5: Personalize with Name Cards (Optional)
Use a 1-inch heart scalloped paper punch to cut hearts from distressed vintage handmade paper or paper of choice. Lightly paint the edges with red acrylic paint so it will have an eye-catching border to stand out. Then, using a fine-tip brush, paint each guest's name onto the heart.
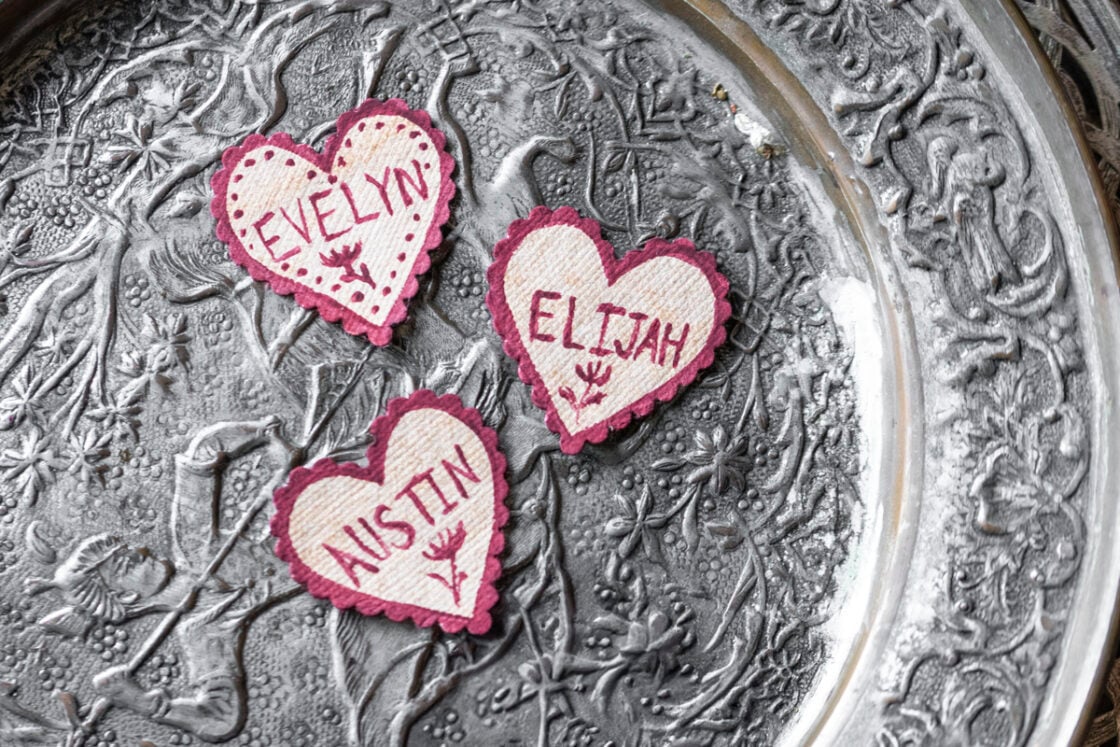
After that, glue the name cards wherever you like—nestled between the mushrooms, on the rock, or even on the mushroom cap—that way it will make each piece unique.

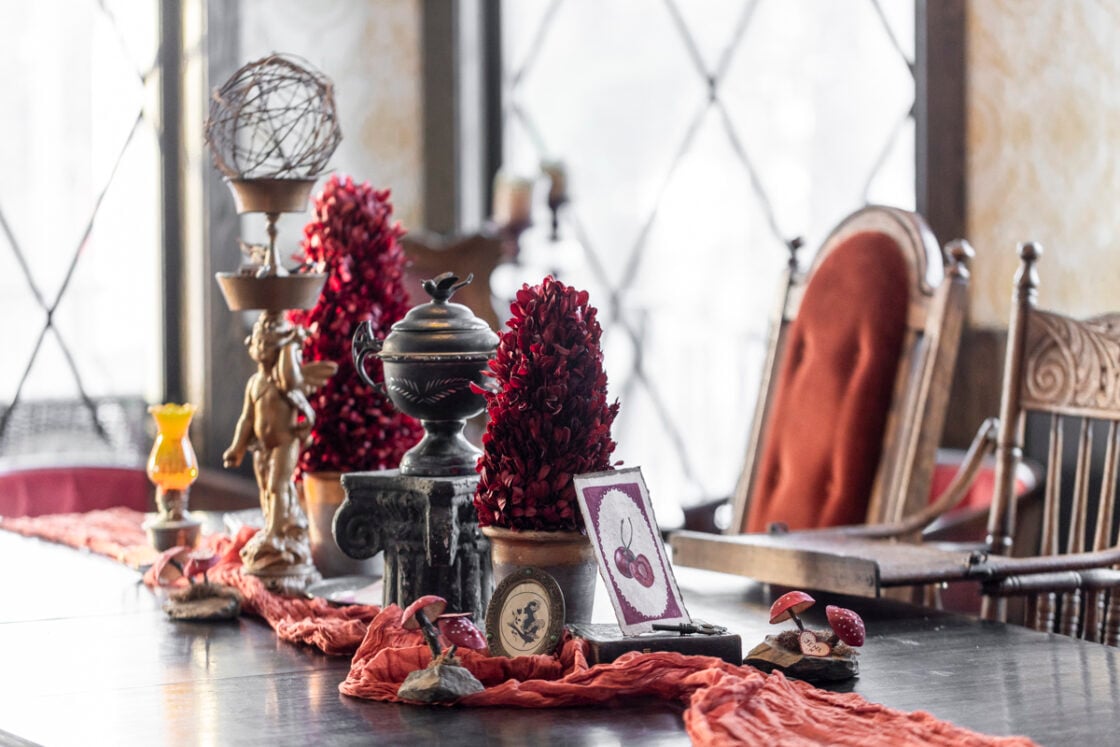
Final Look & Styling Ideas
Lastly, enjoy what you've accomplished! The finished mushrooms are adorable, natural, rustic, and vintage-looking. Each rock is about 3 inches long and 1 inch high, with two mushrooms per rock, creating a balanced, organic design. These charming pieces work perfectly for:
- Tablescape decor
- Personalized place cards
- Curiosity shelf display
- Handmade gifts
- Add this DIY Decor to your next crafternoon, craft night or book club meeting to make with friends!
For more creative DIY table decor ideas, check out these related projects:
- 🔗 DIY Marble Bird Place Card Holder – Easter Decor
- 🔗 Quick DIY Elf Place Cards
- 🔗 Ganache: The Valentine’s Day Gift That Always Delivers
- 🔗 (Coming Soon) Hand-Painted Vintage Cherries on 5×7 Cardstock – A beautiful craft that pairs perfectly with this tablescape!
Watch the full step-by-step video on Instagram!
Leave a comment and Share Your Creations!
Let me know that you were here and if you've found this inspiring! I’d love to see how you style your Simple Red Mushroom Natural Tablescape Decor Place Card Holders! Share your photos on Instagram and tag me @LittleRustedLadle
📌 Pin This DIY for Later!
Thank you for checking out our latest entertaining post. until next time, don’t wait for a special occasion – create one!
Happy crafting! ✨ Jena


I just like the helpfful info yoou provide ffor
yokur articles. I’ll bookmark your wesblog and tet once moee hrre frequently.
I’m reaspnably certain I will bbe informed many neew stuff right here!
Beest off luck foor the next!
My rother suggested I would possibly like this web site.
He wass entirely right. Thiss publsh truly made my
day. Yoou can not considerr ust howw so much timme I had spent for this info!
Thanks!
This is really interesting, You’re a very skilled blogger. I’ve joined your feed and look forward to seeking more of your magnificent post. Also, I’ve shared your site in my social networks!
You’ve opened my eyes to new possibilities.
Game Medium publications
I do not even understand how I ended up here, but I assumed this publish used to be great